
Candle sinkholes and bumpy tops: why they happen and how to get smooth tops every time
October 15, 2026 · 5 min read
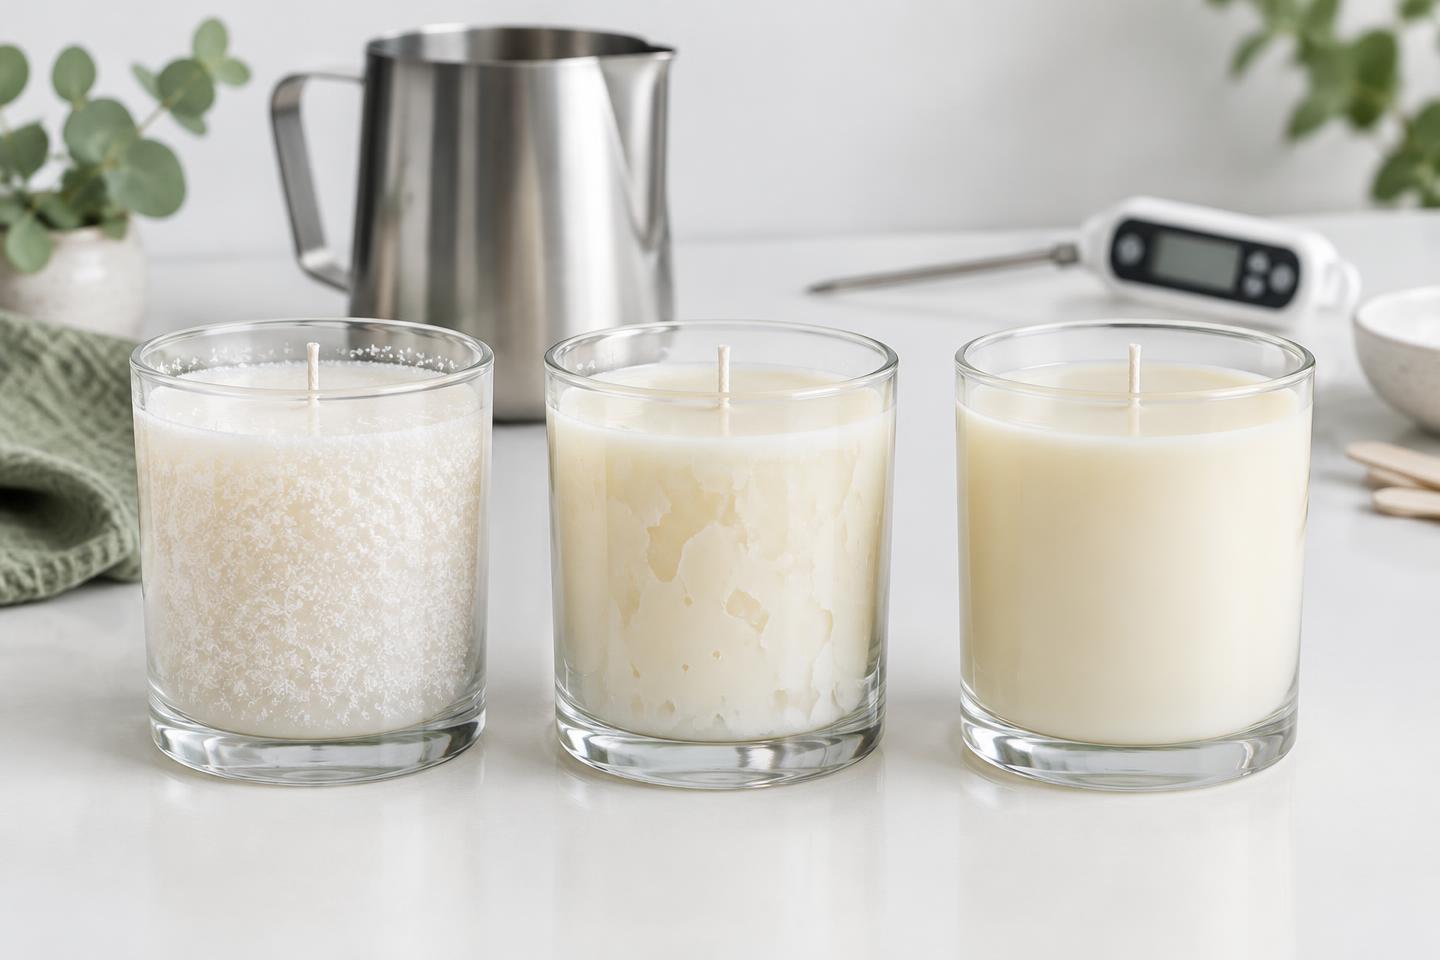
The short answer: sinkholes and bumpy tops happen because wax shrinks as it cools, and it cools unevenly — the outside edge near the glass sets first while the center stays liquid and pulls down as it shrinks. Most tops can be fixed with a heat gun pass or a small second pour. You prevent them by pouring at your wax supplier's recommended temperature, warming the jars, cooling the candles slowly away from drafts, and keeping a little wax back for a top-up pour.
What a sinkhole actually is
All candle waxes contract as they move from liquid to solid. In a container, the wax touching the glass and the surface solidifies first, forming a skin. The liquid core underneath keeps shrinking, which can leave a dip around the wick, a hidden air pocket below the surface, or cracks across the top. A hidden air pocket matters more than looks: it can change how the melt pool forms and how the wick behaves in early burns, which is why many makers poke relief holes before a second pour.
Common top problems and their likely cause
| What you see | Likely cause | First fix to try |
|---|---|---|
| Dip or crater around the wick | Center cooled last and shrank | Relief holes plus a small top-up pour |
| Cracks across the surface | Cooled too fast or in a cold room | Heat gun pass; slow the next cooling |
| Bumpy, cauliflower texture | Soy wax crystallizing as it sets | Heat gun pass; check pour temperature |
| Pull-away / wet spots at the glass | Wax shrinking away from cool glass | Warm jars before pouring; see wet-spot guide |
| Frosting (white crystals) | Natural soy crystal growth | Cosmetic; adjust pour temp, cool slower |
Frosting and wet spots are covered in detail in the soy frosting and wet spots guide. This article focuses on the surface itself.
How to fix a candle top with a heat gun
- Let the candle set fully first — usually several hours to overnight — so you are not chasing a top that is still shrinking.
- Set the heat gun on low and hold it several inches above the surface.
- Move constantly in small circles until only the top layer turns glossy and liquid.
- Stop as soon as the surface melts evenly; going deeper re-creates the shrink problem.
- Let it cool on a level surface away from fans, vents and windows.
How to do a second (top-up) pour
- Hold back roughly 5–10% of the batch wax for top-ups. Many makers keep it warm in the pouring pitcher.
- Once the candle has firmed up, poke two or three relief holes near the wick with a skewer to break any hidden air pocket.
- Reheat the reserved wax a little above your first pour temperature so it bonds to the existing wax.
- Pour just enough to fill the dip and holes — a thin layer, not a second full candle.
- Cool slowly. If the top still isn't smooth, finish with a light heat gun pass.
Illustrative example from a single hypothetical batch, not an industry benchmark. Your mix will depend on wax, room temperature and vessel.
Chart data
| Item | Value () |
|---|---|
| Smooth on first pour | 22 |
| Fixed with heat gun | 11 |
| Needed second pour | 6 |
| Re-melted and repoured | 1 |
Prevention: the habits that matter most
| Habit | Why it helps |
|---|---|
| Pour at the supplier's recommended temperature | Each wax has a range where it sets most evenly — check the spec sheet for your exact wax |
| Warm the jars | Reduces the temperature gap between wax and glass, so the edge doesn't set first so quickly |
| Cool in a still, room-temperature space | Drafts and cold surfaces speed up uneven cooling |
| Space jars apart while cooling | Jars packed tightly cool unevenly on the inside versus the outside of the tray |
| Stir fragrance gently, then rest briefly | Reduces trapped air bubbles that rise and pit the surface |
| Keep top-up wax in reserve | Makes the fix routine instead of an emergency |
Wax manufacturers publish pour and cooling guidance for their specific blends — for example, CandleScience's candle making troubleshooting guide covers sinkholes, cracks and rough tops. Use the spec sheet for your exact wax as your starting point and adjust from there.
Pour temperature vs finish: run a mini test
If your tops are inconsistent, test one variable at a time. Pour four jars of the same recipe at four temperatures across your supplier's range, cool them side by side, and photograph the tops after 24 hours. Note the room temperature too.
Illustrative example scoring tops from 1 (rough) to 10 (smooth) in one hypothetical test. The best temperature differs by wax — always start from your supplier's range.
Chart data
| Item | Value () |
|---|---|
| 125°F | 5 |
| 135°F | 7 |
| 145°F | 9 |
| 155°F | 6 |
When it's not just cosmetic
- If a candle tunnels or burns unevenly after you fixed the top, the problem may be the wick, not the surface — see the tunneling and melt pool guide.
- If cracks reappear after each fix, check whether the candle is cooling somewhere cold, such as a garage, window ledge or metal shelf.
- Let fixed candles cure fully before burn testing; the cure time guide explains why.
Track what works
The fastest way to stop fixing tops is to write down what you did when they came out right: wax, pour temperature, jar temperature, room temperature and cooling time. WaxLogic batch records and the batch quality control checklist make that note part of every pour, and the free candle calculator helps you portion wax so you always have top-up wax left over.
Run your candle business in one place
Inventory, recipes, production, wholesale and invoicing — 7 days free, no card needed.
Start free trial